
Unit Testing Embedded C: Off-Target with CppUTest on Windows
The reasons for having unit tests in your projects are well-known and accepted; I'm not going to rehash them here. Whether you follow the school of thought that says you must write the tests first or your tests are written to prevent regressions and confirm that the implementation matches the design, you're going to need some unit tests. What I'm trying to do with unit tests is checking that complex logic matches the requirements, but I'm not necessarily interested in driver-level code or hardware-specific tests because the idea is to run them off-target.
There needs to be as little friction as possible to you running the tests so that they get run frequently during the development process. Making them run as part of the build process means they don't get forgotten, but then they need to run fast to not get in your way. Adding them to the CMake script makes them part of the build process and the setup I describe here with CppUTest doesn't have delays before starting the tests that I've experienced with MSTest in Visual Studio. But either solution is faster than programming a chip on a board which fails to program some of the time and sometimes needs a USB reconnection, just so that we can check if the application logic hasn't been mangled unintentionally.
Why CppUTest?
CppUTest is one of the more popular C and C++ test frameworks due to it's promotion by James Grenning, author of one of the few books on test driven development for embedded. Since I'd already used a different mainstream alternative, googletest, and have covered Microsoft's MSTest and the open source minunit here before, I wanted to learn and use CppUTest for the countdown timer project.
There are instructions for using CppUTest with Visual Studio on Windows but I wanted to not be dependent on the Microsoft licencing or the MSVC compiler and instead use GCC and CMake instead of Make. But this seems to be a difficult path to go down and I had trouble finding anyone else who has done this combination, so hopefully this will help you if you also want:
- pure C (not C++) application
- GCC compiler invoked by
- Visual Studio Code configure the build using
- CMake which sets up dependencies and creates binaries using
- Ninja, and CMake sets up test builds using
- CppUTest which is automatically run on each build
Before we go any further, I don't want the name "CppUTest" to put anyone off who doesn't know C++. There's very little C++ needed to write the tests and the test-specific syntax is well documented. The project is structured to keep the tests out of the application so your codebase doesn't get polluted and it doesn't affect your embedded IDE building the C project.
The use of cascading dependent make files and bash scripts to construct CppUTest doesn't make it the easiest system to work with on Windows compared to the newer and inherently cross-platform CMake build system. I've done my best to convert it to CMake but am not an expert in any of these three technologies. All I can say is that I've got unit tests running in this environment and it's proving very useful, but I'm not claiming that all features of CppUTest (i.e. mocks, fakes, spies) have been converted. Treat it as a getting started project and see if it's sufficient for your needs. I'd be happy for someone knowledgeable to make improvements and either send me a pull-request on GitHub or email me a link to their improved CMake scripts and I'll update this post.
Sadly, as is often the way of open source projects, you'll have to overcome some problems along the way to even get the minimum functionality working. I found the CMakeLists.txt file in the latest release of CppUTest (4.0) had an error and there were warnings when building this as a library, but it still worked in the end. If you've been in the embedded world for any length of time, you'll know that persistence in the face of setbacks is the key to getting to completion.
Grenning suggests that your CppUTest folder lives inside your project, but it's an organisation that I don't like and turns out not to be necessary. I'm not convinced that keeping the test system inside your project is necessary to be able to reconstruct the whole state of the system a later time. We don't do the same for the compiler, the version of make or CMake or any other tool, instead keeping a record of the version used. Most companies don't even archive those tools and rely them being downloadable, because they often have their own dependencies which eventually include the operating system, and no-one wants to contemplate downgrading their OS and risking security problems to be able to rebuild historic versions. Probably Docker is the way to go for that, but it's not necessarily something most embedded developers would know about, so could be yet another hurdle.
The following instructions will give you a standalone installation of CppUTest that you can link to from your projects. I'd recommend putting it into it's own repository and keeping a note in your project repo which version (tagged) you've used at your project's release, in the same way as you would for the compiler version.
Pre-install Setup
In the previous post, we installed GCC (TDM-GCC), CMake and Ninja. Before proceeding, check GCC, make and g++ have been installed correctly, as CppUTest depends on them, using these commands in a cmd window
gcc --version
g++ --version
mingw32-make --version
to check that some version message is displayed and not a is not recognized as an internal or external command error. If any of these are not recognized, check your installation of TDM-GCC and that the system environment variable Path includes a valid path to the TDM-GCC-64\bin folder.
Install CppUTest, build it and run self-tests
We'll be using release 4.0 from GitHub.
Download the zip file and unzip the contents into a folder on your local drive eg C:\cpputest so that all the files and folders are inside that designated folder eg c:\cpputest and not down in one more folder like cpputest-4.0It doesn't have to be directly at the root as I've shown, just substitute your path for this one in the rest of this post.
We need to set a couple of environment variables so that these folders can be found by the script. From the Start menu, start typing env, click Edit the system environment variables, click on User variables, New
Add CPPUTEST_HOME with a path to your cpputest folder, eg c:\cpputest.
Add CppUTest_INCLUDE_DIRS with a path to your cpputest/include folder eg c:\cpputest\include.
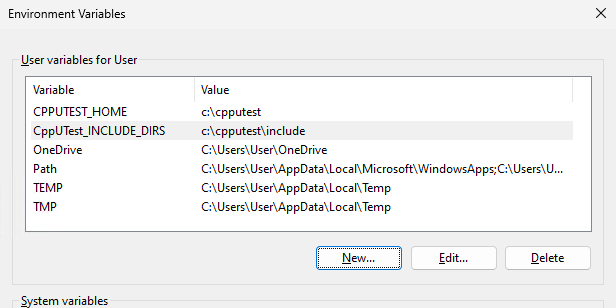
Click Ok twice to close the dialogs.
To complete the installation, we have to build a couple of libraries which our application project will link to. These are built within CppUTest using VS Code and TDM-GCC.
Open your cpputest folder with VS Code, accept the dialog to trust the authors for this folder, select the Kit to use TDM-GCC. There are two steps here, one to configure the build, the second to run the build.
CMake Configure will automatically run but fail due to errors in the CMakeLists.txt file which need to be corrected, so cancel the Configure Failed dialog, open CMakeLists.txt and change line 8 to use a minimum CMake version of 4.0 and move line 1 project(CppUTest) to line 8/9, i.e. after the cmake_minimum_required() line.
Save the CMakeLists.txt file and VS Code will rerun the configure, there should be no problems this time, you should see
[cmake] -- Configuring done ...
[cmake] -- Generating done ...
[cmake] -- Build files have been written to: ...
in the Output tab.
To run the build, click the ⚙️ Build button in the status bar. Version 4.0 has 8 warnings which you'll see in the Problems tab, from the file SimpleString.cpp but they don't prevent progress.
Click the ▶️ Run button in the status bar and you'll get a couple of options for the launch target.
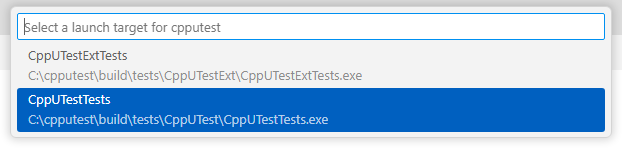
choose CppUTestTests, and in the Terminal pane you should see a grid of dots and exclamation points, the number of tests and an OK which shows that the self-tests work. For example, I get
OK (842 tests, 789 ran, 1485 checks, 53 ignored, 0 filtered out, 95 ms)
which also shows how fast we can run host-based tests on a modern laptop (Intel Core Ultra 7 258V). Unit tests should never make you wait while developing code.
Copy the Library Files
Make a lib folder in your c:\cpputest folder which is going to hold the lib files.
In VS Code Explorer tab, right click the build folder and Reveal in File Explorer. Navigate down the folders into build\src\CppUTest and find the libCppuTest.a file, copy it to your new lib folder c:\cpputest\lib. Also copy libCppUTest.a from \build\src\CppUTestExt to the same c:\cpputest\lib
Now we are ready to use CppUTest with an embedded C codebase.
Running Tests in Countdown Timer project
I'm using my Countdown Timer project as an example; once you've got this working you can see what to copy over to your own or a new project. There are three steps: configure the project with CMake, Build the project, Run the test executable.
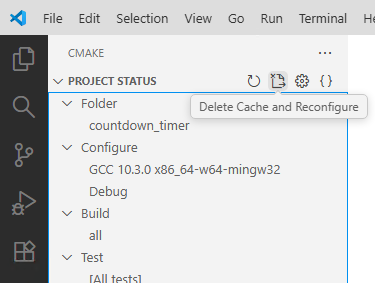
Open the Countdown Timer folder with VS Code, trust the authors, scan for kits - GCC 10.3.0 TDM-GCC, delete the cache and reconfigure using the clean tool in the top right of the CMake Tools panel next to project status.
Click the⚙️ Build button in status bar, it should build ok in a couple of seconds, the end of the build process looks like this in the terminal
[build] [21/22  90% :: 1.040] Building CXX object CMakeFiles/timer_tests.dir/tests/FSM_Tests.cpp.obj
[build] [21/22  95% :: 1.157] Building CXX object CMakeFiles/timer_tests.dir/tests/Seg_Tests.cpp.obj
[build] [22/22 100% :: 1.554] Linking CXX executable timer_tests.exe
[build] ...........................
[build] OK (27 tests, 27 ran, 110 checks, 0 ignored, 0 filtered out, 0 ms)
[build]
[driver] Build completed: 00:00:01.619
[build] Build finished with exit code 0
To run the test executable, use any of these options: click the ▶️ Run button in the status bar, 🐞 Debug button in the status bar, or use the terminal to run the timer_tests executable as shown below.
The test executable has been set up to only show summary information, if you want to see a complete list of tests with their execution times, use the verbose option -v in the terminal .\build\timer_tests -v which should give you a result like this
TEST(FormatOutputSpy, PrintMultipleOutputsPastFull) - 0 ms
TEST(FormatOutputSpy, PrintMultipleTimes) - 0 ms
TEST(FormatOutputSpy, LimitTheOutputBufferSize) - 0 ms
TEST(FormatOutputSpy, HelloWorld) - 0 ms
TEST(FormatOutputSpy, Uninitialized) - 0 ms
TEST(FSM, complete_to_presleep) - 0 ms
TEST(FSM, counting_to_complete) - 0 ms
TEST(FSM, counting_to_presleep) - 0 ms
TEST(FSM, counting_to_counting) - 0 ms
TEST(FSM, sleep_to_presleep) - 0 ms
TEST(FSM, sleep_to_counting) - 0 ms
TEST(FSM, presleep_to_counting) - 0 ms
TEST(FSM, presleep_to_sleep) - 0 ms
TEST(FSM, uninit_to_presleep) - 0 ms
TEST(FSM, init) - 0 ms
TEST(SegTests, char_to_segs_out_range) - 0 ms
TEST(SegTests, char_to_segs_in_range) - 0 ms
TEST(SegTests, no_leadz_60min) - 0 ms
TEST(SegTests, no_leadz_15min) - 0 ms
TEST(SegTests, leadz_1234) - 0 ms
TEST(SegTests, no_leadz_1234) - 0 ms
TEST(SegTests, leadz_12) - 0 ms
TEST(SegTests, no_leadz_12) - 0 ms
TEST(SegTests, leadz_8) - 0 ms
TEST(SegTests, no_leadz_8) - 0 ms
TEST(SegTests, leadz_1) - 0 ms
TEST(SegTests, no_leadz_1) - 0 ms

OK (27 tests, 27 ran, 110 checks, 0 ignored, 0 filtered out, 91 ms)
Debugging Tests in Countdown Timer Project
Place a breakpoint in any valid line in a file in \tests or in a called C function. Click the bug icon in the status bar
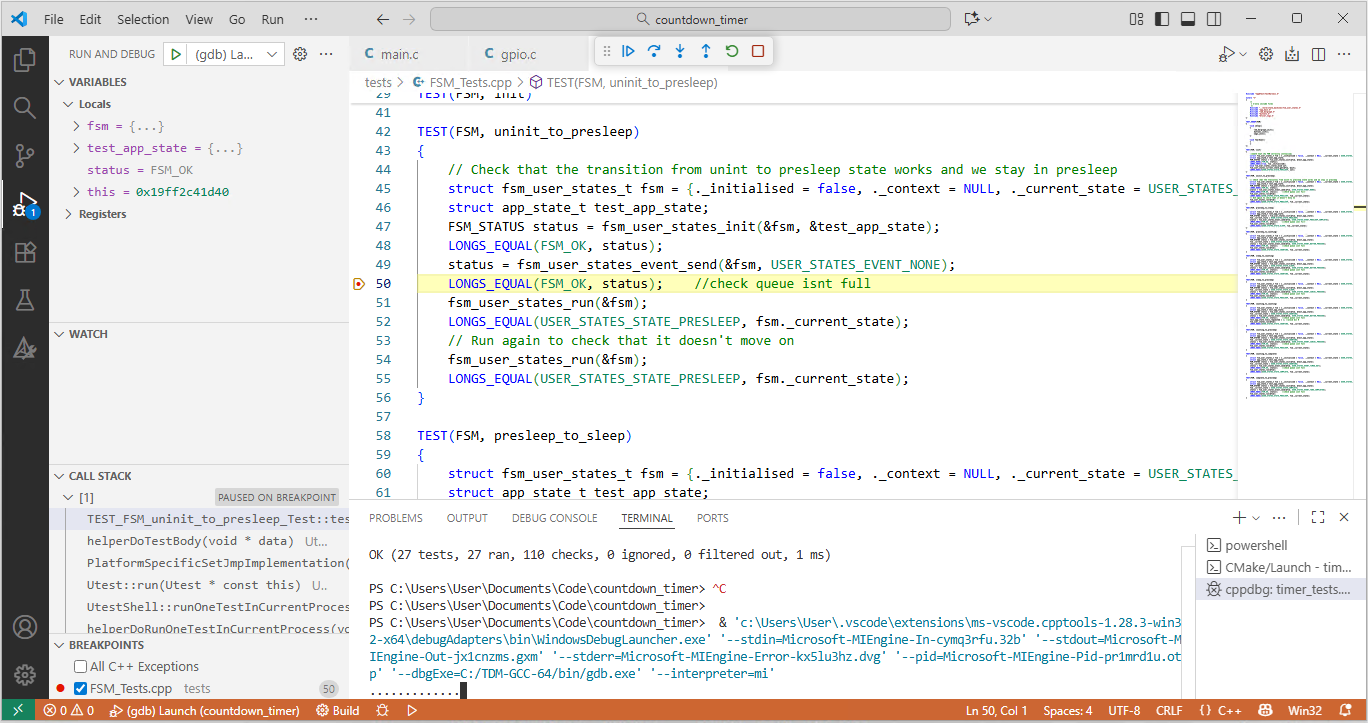
and use the floating button bar at the top of the window, or F10 to step, F11 to step into.
Adding Tests
In \tests, *_Tests.cpp add another TEST(test_group, your_test_name), it will be automatically picked up and added.
Tests are part of a test group which has a specified setup() and teardown() called before and after each test automatically.
TEST_GROUP(FSM)
{
    void setup()
    {
        led_bargraph_init();
        buttons_init();
        segs_init();
    }

    void teardown()
    {
    }
};
When you need to call functions in new C files, add the #include in the extern C section at the top of the tests.cpp
extern "C"
{
    /*
     * C-only include files
     */
    #include "../Core/state_machines/fsm_user_states.h"
    #include "app_main.h"
    #include "led_bargraph.h"
    #include "buttons.h"
    #include "driver_segs.h"
}
Other buttons in VS Code might give warnings or errors
There's a lot of build buttons and ways to run CMake Configure, Build, Run and Debug in different locations in VS Code, and not all of them work with this project and following these instructions. Stick to the ones I've described and you can get a usable project which you can then spend time on to develop your application and tests.
Tips for working in this environment
Regularly check that your code also builds (at least) in your embedded IDE.
If VS Code isn't finding one of your .h files, try Ctrl-Shift-P Developer: Reload Window.
Since the build step now includes running the tests, it looks like builds fail if a test crashes. You can still debug your code in this state.
Your embedded code will need some features removing, #define ing out (or preferably, mocking) to be able to run on Windows. Writing to GPIO registers is probably the most common one. But at this stage, I'm only trying to test the higher levels of the code, not the lowest driver levels, where at some point you'd have to mock the hardware behaviour which is a much more expensive endeavour and might not be worthwhile with the scale of your project.
The subjects of how to structure your code to make testing easier, how to approach writing tests, what test coverage you should achieve etc are all out of scope for this blog post.
Starting a new project from this example
CMakeLists.txt
Review everything in the user settings section, up to line 109.
Change the project name on line 10.
Change the chip-specific includes lines 94-99 and 106
Use #ifndef UNIT_TEST to remove HAL or hardware code.
Review the warning flags for the compiler and the C standard option, for example you might need C99 or C23. It should be the same as the option chosen in your IDE.
Add your tests in \tests
Continuous Integration
By triggering these tests in the CMake script, they are run on every build. So you get immediate feedback if a test fails, and you can't forget to run all the tests after adding a new one or some application code as long as you don't only build in your embedded IDE.